
One Tip to Fight Blisters
 During my first year of running, I battled many opponents – motivation (I’m tired!), chaffing (ouch!), and and an out of shape body that protested on many fronts. Many of these body battles were blisters and hot spots on my feet. These became a real problem the last 6 weeks or so before my first marathon as I started running longer distances in training.
Obviously, foot blisters are not what you want as a runner. I even committed the cardinal sin of race day at my first marathon – trying something new. In an effort to thwart the hot spots, I applied mole skin to the bottom of my foot. If you don’t know, moleskin is a thin, adhesive bandage material used to prevent rubbing. I bought a pack of it and cut a shape to contour my foot, covering the hot spot area. I tested the day before the race, only by walking around, not by running.
On race day, I set out with the moleskin in place. By mile 4, I was in trouble. I could tell a blister was forming in a different spot. See, the mole skin was doing its job on the target spot, but it was causing a problem on another spot. Arggh!
I stopped around mile 6, took off my sock and shoe, and removed the moleskin. It was too late, though. The blister was there, on the side of my foot. I then proceeded to re-tie my shoe too tight to try to prevent slipping. Then I ran the last 20 miles in pain. Well, more pain than a marathon should, anyway. At the end, I had a massive blister that took a long time to heal.
My solution to blisters turned out to be very simple. I learned to tie my shoes – differently. Thanks to Mike at The Extra Mile in Charleston, SC for teaching this to me. This works best on a pair of shoes that have that last eyelet that is slightly lower than the next to last one. I always wondered why that eyelet was there.
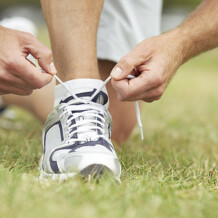
Here’s how to do this:
1. Lace your shoes but skip the next to last hole on each side.

Skip Next to Last Hole
2. Then insert them back into the next to last hole from the outside, creating a loop.

Insert Here

Loop
3. Cross the string, taking each end of the string through the opposite side loop.
4. Now you can pull on the string to tight the shoe around the top of the foot, while leaving the strings looser over the toes. This keeps your shoe from moving around and causing blisters.

Complete
Since I made this change two-plus years ago, I have not had blister problems. If you struggle with blisters or hot spots, give this a try. Let me know your results.
POFIFOTO!
If you find this useful, please consider subscribing to e-mail updates by using the form below:
Related Posts
Tags
Share This


